Run sgx-pytorch on Alibaba Cloud Linux release 3 / CentOS 8
Run sgx-pytorch on Alibaba Cloud Linux release 3 / CentOS 8
Refer to:
- sgx-pytorch/enclave_ops/README.md at sgx · intel/sgx-pytorch (github.com)
- 如何基于安全增强型实例部署PyTorch技术架构_云服务器 ECS-阿里云帮助中心 (aliyun.com)
I highlight the differences.
1. Preinstall
Please follow Intel SGX to install Intel SGX (Please Make sure your local device and cloud device can support Intel SGX and FLC by hardware), and setup the DCAP server.
DCAP server allows you to do remote attestation on your hosted server, without connecting to the external Intel service.
**# Remove Python 3.6
sudo yum remove python3 python3-pip
# Install Python 3.8
sudo yum install python38 python38-pip python38-devel**

# Check Python and Pip version, ensure you are using Python 3.8
which python
pip --version

**pip install glog
# sgx-pytorch version 1.8.0 requires torchvision version 0.9.0
# https://pypi.org/project/torchvision/
pip install torchvision==0.9.0**
pip install astunparse numpy ninja pyyaml mkl mkl-include setuptools cmake cffi typing_extensions future six requests dataclasses setuptools_rust pycryptodome cryptography

git clone https://github.com/intel/pytorch -b sgx

**# I encounter network error even after setting up GitHub proxy like ghproxy.com
# Submodule is ok, but those subsubmodule with depth>1 will throw network error
# Finally, I setup Clash and fix the error. https://github.com/juewuy/ShellClash**
**git submodule sync && git submodule update --init --recursive**
2. Compile and start the key service on the key server side (local deployment by the model owner):
cd enclave_ops/deployment
make
cd bin/dkeyserver
sudo ./dkeyserver
The key server starts and waits for the key request from the dkeycache deployed on the SGX node. This service has two built-in model keys as test keys, and users can update and maintain them according to actual applications.
3. Compile and start the local key distribution service on public cloud side (cloud server deployment):
cd enclave_ops/deployment
make
cd bin/dkeycache
sudo ./dkeycache
After key cache service is started, this service will obtain all model keys. This service get key through SGX Remote Attestation, and sends the key to PyTorch with SGX’s enclave through SGX Local Attestation.
4. Compile PyTorch with SGX on public cloud side (cloud server deployment)
4.1 Compile oneDNN used by enclave
**# Set PyTorch_ROOT
PyTorch_ROOT=/opt/sgx-pytorch**

**# On Aliyun Linux, set SGXSDK_ROOT
SGXSDK_ROOT=/opt/alibaba/teesdk/intel/sgxsdk

source ${SGXSDK_ROOT}/environment**

cd ${PyTorch_ROOT}/third_party/sgx/linux-sgx
git am ../0001*
cd external/dnnl
make
sudo cp sgx_dnnl/lib/libsgx_dnnl.a ${SGXSDK_ROOT}/lib64/libsgx_dnnl2.a
sudo cp sgx_dnnl/include/* ${SGXSDK_ROOT}/include/
4.2 Compile enclave used by PyTorch
source ${SGXSDK_ROOT}/environment
cd ${PyTorch_ROOT}/enclave_ops/ideep-enclave
make
The enclave of PyTorch with SGX provides model parameter decryption and reference calculations. Note: There are 8 logical processors by default in Enclave/Enclave.config.xml. If the actual machine is greater than 8, the
4.3 Compile PyTorch
cd ${PyTorch_ROOT}
pip uninstall torch (uninstall the Pytorch installed on the system, the self-compiled Pytorch will be installed)
source ${SGXSDK_ROOT}/environment

**# Compile CPU version, if no GPU on the server**
**USE_CUDA=0 python setup.py develop --cmake-only

# If you get error msgs, fix the error and rebuild
# less build/CMakeFiles/CMakeError.log
# make clean**
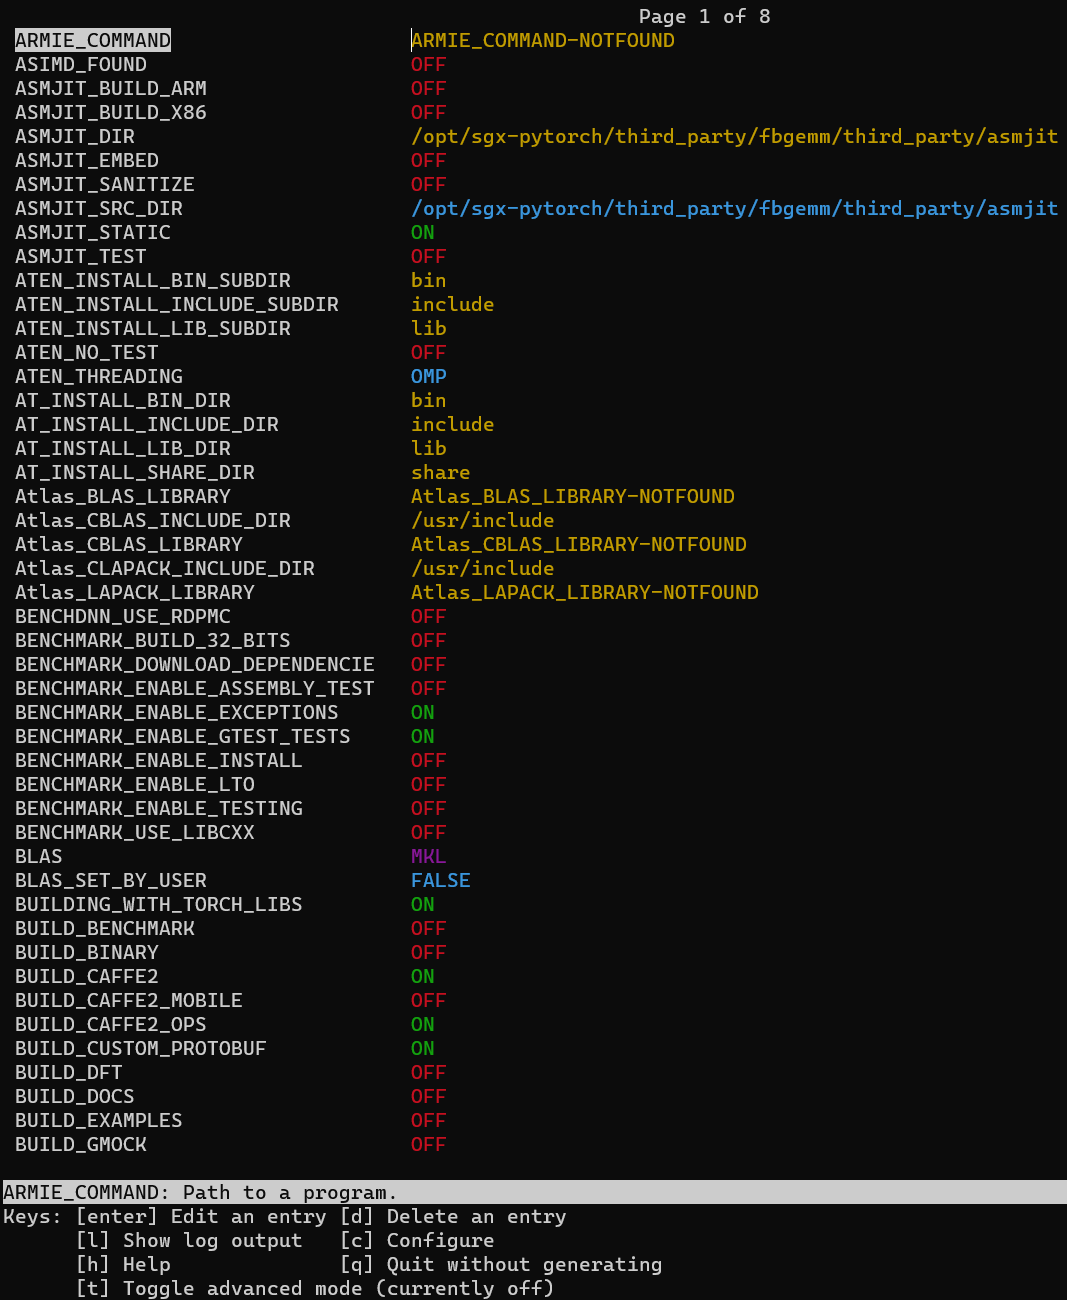
You may check the CMake summary output for Caffe2. Ensure USE_CUDA = 0
-- ******** Summary ********
-- General:
--   CMake version         : 3.20.2
--   CMake command         : /usr/bin/cmake
--   System                : Linux
--   C++ compiler          : /usr/bin/c++
--   C++ compiler id       : GNU
--   C++ compiler version  : 10.2.1
--   CXX flags             :  -
...
**--   USE_CUDA              : 0**
Also, you can use ccmake build to adjust build settings.
Finally, build and wait for hours. Take coffee and rest~
sudo python setup.py develop && python -c "import torch"
4.4 Compile PyTorch secure operators
source ${SGXSDK_ROOT}/environment
cd ${PyTorch_ROOT}/enclave_ops/secure_op && mkdir build && cd build
cmake -DCMAKE_PREFIX_PATH="$(python -c'import torch.utils; print(torch.utils.cmake_prefix_path)')" ..
make
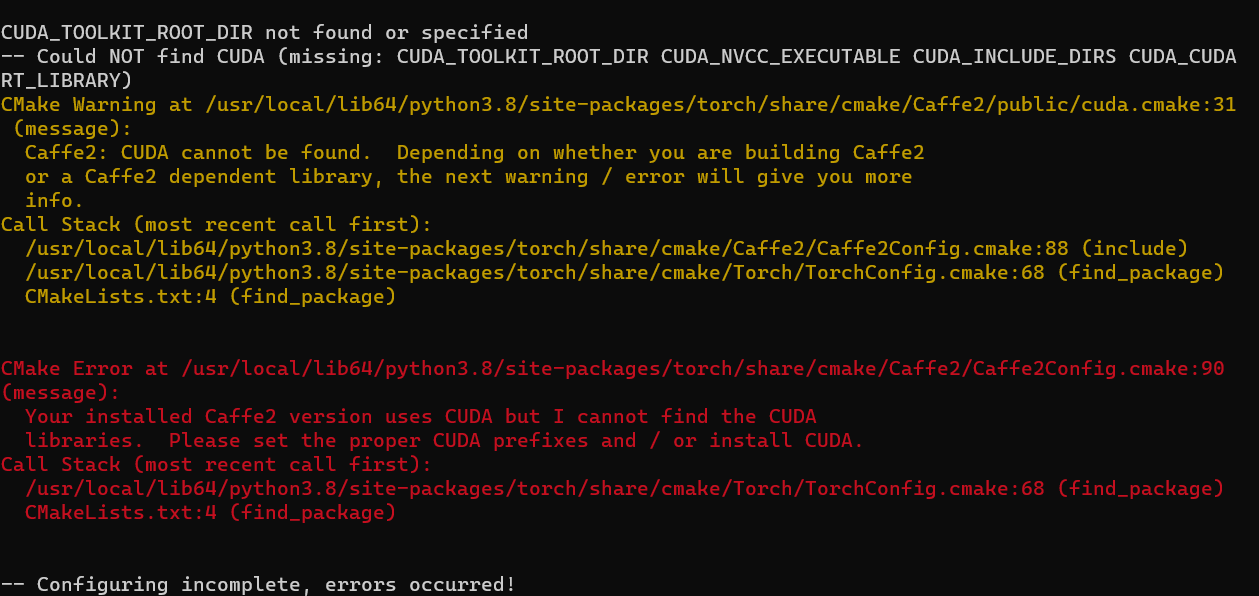
If you get Caffe2 CUDA error, you shall go back to 4.3, adjust pytorch compile settings using ccmake and recompile.
5. ResNet-based test case
cd ${PyTorch_ROOT}/enclave_ops/test
sudo python whole_resnet.py
How sgx-pytorch works?
Python interface -> Custom C++ Operators -> C++ Enclave
Python interface
sgx-pytorch/torch/utils/secure_mkldnn.py at sgx · intel/sgx-pytorch (github.com)
def forward(self, x):
      torch.ops.load_library(LIB_PATH)
      return torch.ops.my_ops.secure_linear(
          x,
          self.encrypted_weight,
          self.encrypted_bias)
      #x_mkldnn = x if x.is_mkldnn else x.to_mkldnn()
      #y_mkldnn = torch._C._nn.mkldnn_linear(x_mkldnn, self.weight, self.bias)
      #y = y_mkldnn if x.is_mkldnn else y_mkldnn.to_dense()
      #return y
Custom C++ Operators
Extending TorchScript with Custom C++ Operators — PyTorch Tutorials 2.0.1+cu117 documentation
Call C++ Enclave